Thursday, March 17, 2016

DIY | Lemon Grass and Sugar Bodyscrub


As we usher spring, the hard but rewarding prep-work in our vegetable and flower gardens started last weekend. Also, hubby and I started preparing the coop and the chicken garden in anticipation of the arrival of 10 new pullets to add to our growing family.

After the hard work, there's nothing more relaxing than a hot shower punctuated by a body scrub using my homemade Lemon Grass Sugar Body Scrub .... ah pure bliss!


Since I discovered the wonders of natural pure essential oil and a little help from my kitchen supplies, I have been mixing my own body care pampering essentials like bath salts (find the post here), body scrub and lip exfoliant. True, you will be investing a little amount of money when you buy your pure essential oil but a small bottle goes along way. In the end, you will still save compared to buying expensive commercial body scrubs. You can also use the same essential oil to make bath salts, room/pillow spray, massage oil. etc.

Body scrub basically contains 3 components : body oil, raw exfoliant and essential oil. To be honest, essential oil in body scrub is optional {first 2 ingredients are a must} but, since I am making something to pamper myself, the scent of essential oil is bliss!

Body oil : the most commonly used oil in home made body scrubs are olive oil, coconut oil, grapeseed oil, jojoba wax, sweet almond oil, rose hip oil and avocado oil. These oils vary in prices, thickness and access. Personally, during winter, I prefer grapeseed oil because its great for repairing broken skin cells (particularly on my heels} and its great for rejuvenating the skin. Its light smell does not overpower my essential oil. Some find its consistency too thick. Again, its a matter of preference and budget too.

Raw Exfoliant : you have all of these in your pantry! Salt, sugar and coffee. Again, the choice is depending on a number of factors - roughness, time to dissolve in oil, and which part of the body you are going to use it. Sea salts tend to be rough for those who have sensitive skin but it is a great exfoliant specially for the knees elbows and feet. Sugar is best for those with sensitive skin. Although softer that sea salts, it still an excellent tool to remove dead skin. Remember, granulated sugar is softer that coarse sugar. So if you are using it for your face, avoid coarse sugar. I prefer Turbinado Sugar for my body scrub. Also, bear in mind that sugar tends to dissolve easily in oil, so don't make a big batch if you don't intend to use it often. I don't like to use coffee for the simple reason that it leaves a mess n my tub.

Pure Essential Oil : some of my favorites that I have in my stash are lavender, mandarin, vanilla, peppermint, eucalyptus, rosemary and lemon grass. I either use it as a single scent or combine two scents together. Buy in reputable stores.

Just want to share this tips I read regarding essential oils :
  • Do not apply directly to skin. They are highly concentrated and can irritate skin and cause rashes.
  • Buy essential oils that come in dark bottles. This will prevent oil from direct light/sunlight exposure. It guarantees longer shelf-life.
  • Use only a few drops. You just want its mild scent and not an irritant to your nostrils.
  • There are some oils that pregnant women should avoid. Consult your physicians before using any oil while pregnant.


For this particular body scrub, here's how I did it.

Ingredients 
1 cup Turbinado Sugar
1  cup grape see oil
4 drops lemon grass essential oil

Procedure
Combine all ingredients in a bowl and mix well
Store in glass containers { essential oil will damage plastic and metal changes the the properties of the oil}

To Use
Take a small amount of the scrub with a spoon
Rub all over your body which special attention to areas like feet, knees and elbows
Let it stand for 3 minutes
Rinse off and pat dry with towel


Remember to pamper yourself once in a while! You deserve it!


Monday, March 14, 2016

The Joys of Spring | @ the Sugarbush


It was a very sweet, perfect whether Saturday for hubby and I as we continue our yearly tradition of visiting a maple tree farm as soon as the sap start dripping from the bark. This year we went to Bruce's Mill Conservation Area where Maple Syrup Festival is celebrated yearly.


Visitors have a choice to start their day at the farm by either a wagon ride to the forest or hike along the trails to learn more about the evolution of the liquid gold that we can't get enough of.


"The process of making maple syrup is an age-old tradition of the First Nations people, who used it both as a food and a medicine. They would make incisions into trees with stone and bone implements their tomahawks and use birch bark containers to collect the sap. The sap could be reduced into syrup by evaporating the excess water by plunging hot stones into the sap. They also increased the sugar content by removing the frozen water layer after the nightly freezing of the sap. When the early European settlers came to North America, they learned from the Nativesthe Aboriginal people that sap could be made into sugar." 


"The European settlers had access to metals and used their metal iron tools to tap the trees and then boiled the sap in the iron or copper kettles. Maple syrup was the preferred sweetener used by the early settlers since white refined sugar from the West Indies was highly taxed and very expensive. As white refined sugar became less expensive, it began to replace maple syrup and maple sugar as a relied-upon sweetener. Maple syrup production is now approximately one-fifth of what it was in the beginning of the 20th century." 


"Canada produces about 85 per cent of the world's maple syrup. It is the world leader in exports, selling about 30,000 tones valued at $147 million, to more than 40 countries in 2003. In Canada, the maple syrup industry is surpassed only by frozen French fries in single horticultural commodity exports. Consumption of maple products increased from 110 grams per person in 1991 to 160 grams per person in 2001. Marketing has evolved from selling to traditional markets to more value-added markets due to the ability of the maple syrup flavour to blend well with other food products (cereals, yogurt, etc.). This industry contributes to Canada's value-added exports, since more than 60 per cent of maple exports are now shipped in prepackaged containers."


Like I always say, the transformation from sap to maple syrup is amazing. It takes a lot of patience, perfect timing, tender care, and appreciation before one can truly enjoy its sweetness .... very much like marriage!


Linking with :   Sundays at Home  *  Amaze Me Monday *  


Friday, March 4, 2016

Leftovers Makeover : Tuna Quesadillas and Fresh Guacamole


The most challenging "to do" at home after a 4-day back to back business trips is to cook a decent dinner. Hubby won't mind if we go out instead or buy take out however I take it upon myself to make an effort .... after all I din't see my kitchen for days. The most challenging part is not the fact that I am tired to the bones {can somebody tell me what is it about airplane rides that makes you tired?} BUT the fact that there seems nothing in the fridge that translates into "dear, we are having a nice I-am-finally-home-dinner". 

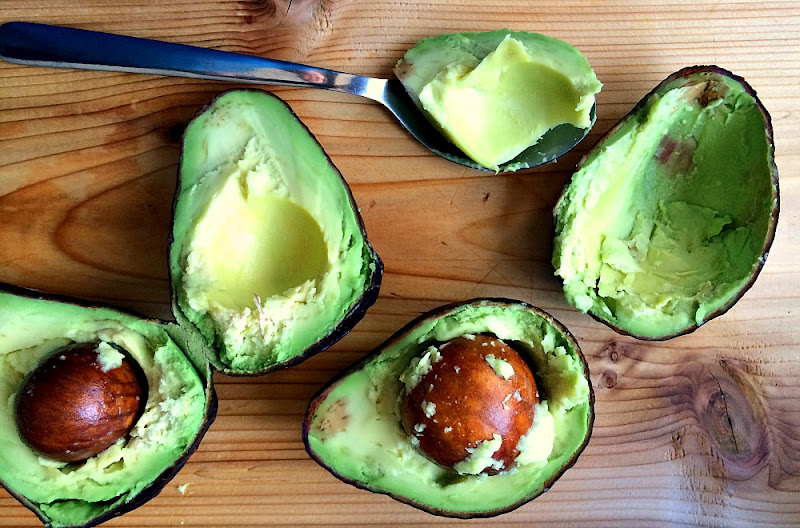
When I opened our fridge last night, this is what greeted me .... a couple of  ripe avocados, half a slice of lime, half a block of Gouda cheese, veggies that have seen better days and leftover tuna flakes and mango chicken. Yeah, a fusion of Italian, Chinese and Mexican. 


It is time for leftover makeover so the wheels in my head started spinning until ....taaaadaaa ... I will make guacamole that will be the side dish for my tuna or mango chicken quesadillas!

My guacamole recipe is very simple but I can guarantee you that its a winner:

Mash {make sure to leave some lumps} 2 ripe avocados, toss in about two tablespoons of minced onion {red onion is preferred}, chopped half tomatoes {seeds and juiced removed}, 1/2 cup chopped cilantro/coriander {leaves and stems}. 1 jalapeno pepper, chopped {I have non of this today so I just used chili flakes}, 2 tbsp lime and salt and pepper to taste. Just mix all ingredients and serve.


Our pantry is always stocked with all sorts of canned beans and today I found re-friend beans which is perfect for my quesadillas.


It took me a little over 30 minutes to conjure this delicious dinner. True enough, after I cut the crispy quesadilla in halves, I heard hubby's car in the driveway. 

After bear hugs and sweet kisses, it did not take long for us to finish these leftovers makeover quesadillas with fresh guacamole. Simply Pure Bliss!


Leftover Tuna Quesadillas

Ingredients {makes 4}

4 pieces small tortilla
8 tablespoons re-fried beans {canned}
2 {85g} cans Clover Leaf gourmet flaked light tuna {I used sun-dried tomato and basil flavour}
1 small red onion {thinly sliced}
1 cup grated cheese
1/2 cup coriander/cilantro leaves , chopped

Procedure

Spread 2 tbsp re-fried beans on tortilla {make sure you spread the beans only on the half potion of the tortilla, leave the other half empty for easy assembly}.
Add about 2 tbsp tuna on top of beans.
Add sliced onions.
Top with grated cheese.
Sprinkle with coriander/cilantro leaves.
Fold the other half of tortilla over toppings.
Spray cooking oil on a heated non stick pan.
Cook quesadilla over medium heat about 2 minutes per side or until crisp.
Cut quesadilla in half and serve with guacamole and/or salsa.


Related Posts Plugin for WordPress, Blogger...