

Oh, hello September!
Was it it only 2 and a half months ago when hubby and I planted herbs in our veggie garden {posted here}? For the last month or so, I have been snipping fresh herbs from the garden as needed for this and that recipe. I have been pampered this way and I know some good things never last. So, I am preparing to prolong the goodness of my valued herbs for the coming winter months {which by the way is just around the corner if you live in the Great White North!}
Sharing with you how I do it here at Birdsong.
Harvesting Herbs for Drying and/or Freezing:


- The peak time to harvest {then dry or freeze} herbs is right before the herb starts flowering. This is the time when the flavourful and aromatic oil content is at its highest level.
- Harvest in mid morning or when the dew is dry to prevent molding.
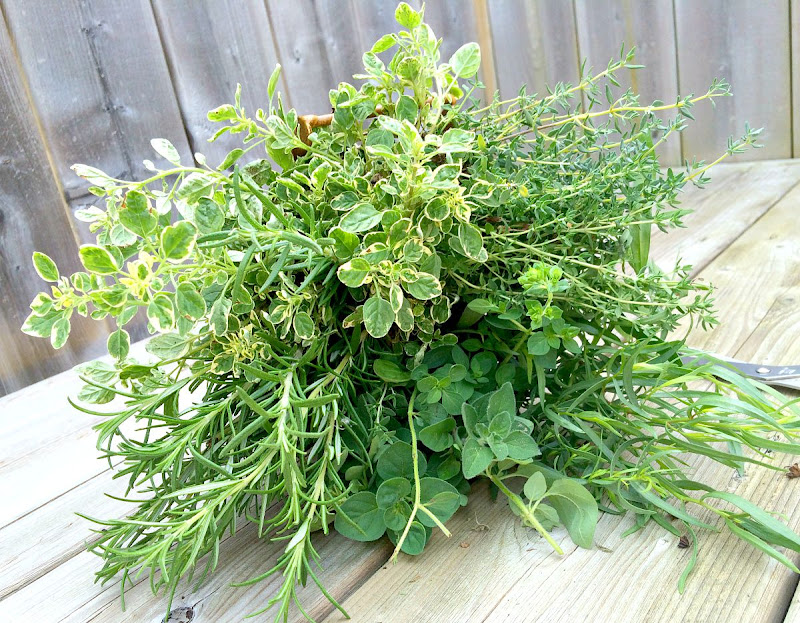
Cleaning Herbs for Drying and/or Freezing


- Make sure the herbs are free from dirt and insects {like this beautiful baby caterpillar} by either gently rinsing them but this process may also remove essential oil from the leaves so I prefer gently shaking each stem to remove impurities.
Drying Herbs:


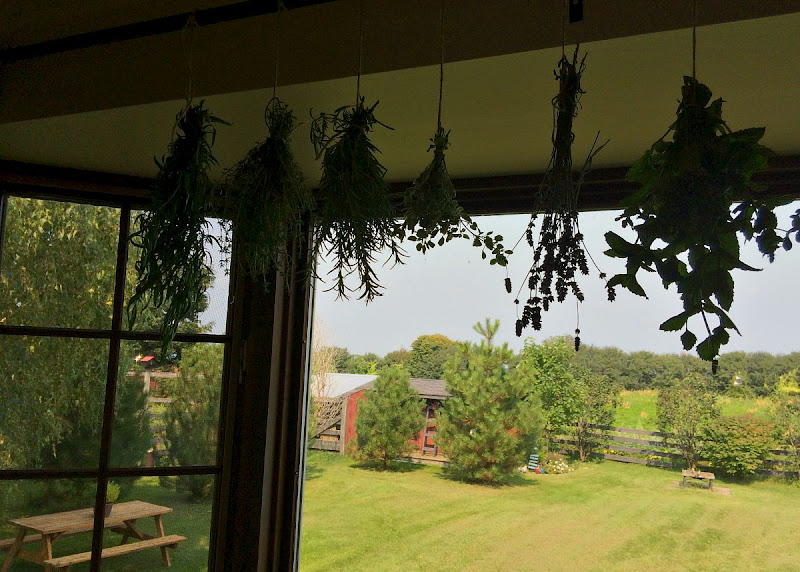
- Drying herbs can be done either by air dry {practical for herbs with low moisture content like rosemary, oregano, thyme and sage} or through food dehydrator or ordinary kitchen oven {best method for herbs with high moisture content like basil, tarragon and mint}.
- I always resort to air drying by simply tying a piece of string to a bunch of the same herb and hanging them upside down in a warm room with good air ventilation/circulation. Avoid the kitchen because of the moisture generated in the room when cooking.
- If the weather is not too hot and there is a enough breeze outside, I hang my herbs in a partly shaded area {direct sunlight will burn the leaves resulting to discoloration} for a good 3 hours then continue drying them inside the house for most part of the day.
- Regularly check herbs for signs of mold or mildew.
- It usually takes 3 weeks for my herbs to be completely dry and ready for storage.
Freezing Herbs:
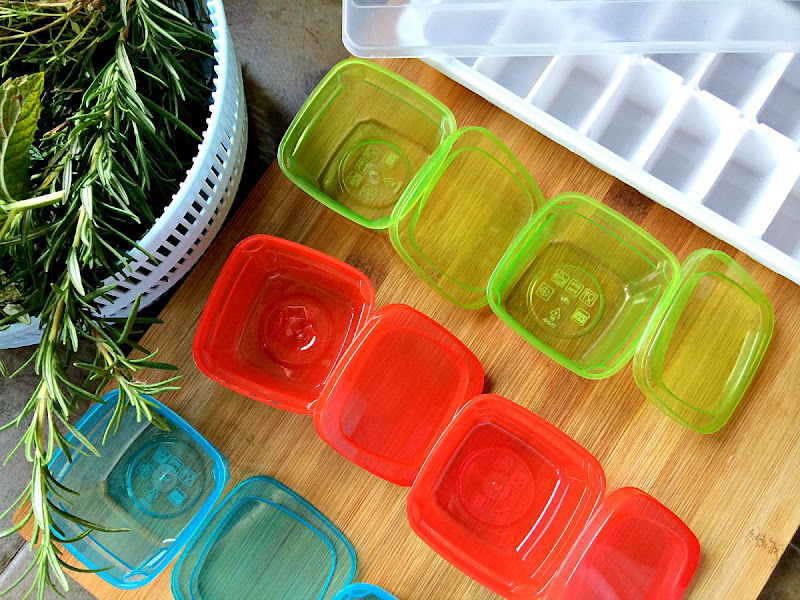
- Use plastic containers for easy removal of frozen herbs. I use ice cube tray and color coded containers for easy identification specially when I am freezing more than 2 herbs.


- For thyme. I tie small bundle of sprigs together and put 2-3 bundles in each water filled container. I do this because when I use thyme in my recipe. I normally use a sprig or two.
- For tarragon, I remove the leaves from the stem before placing them in water filled containers because that's the way I normally use them

- For oregano, because I use them a lot like basil. I prefer to freeze them in water filled ice cube trays.

- Freeze and thaw as needed!
I like to have both dried and frozen herbs in the winter months There are just some recipes that truly calls for fresh herbs like omelettes, Margherita pizza or simply topping a dessert with fresh mint leaves. Dried herbs on the other hand have its own uses like when I'm making soup or braising beef, for example. Don't forget, dried herbs are 3 times more potent or flavourful than its fresh counterpart {example : 1 tablespoon of fresh oregano is equivalent to 1 teaspoon of dry oregano, since 3 teaspoons = 1 tablespoon}.
PS : For those who are wondering what happened to the cute baby caterpillar I found on a mint leaf, I relocated it from the veggie garden {where I found it} to the flower garden where I hope it will transform into a beautiful butterfly one day!

Thank you for visiting!
Linking with : Simple Saturdays * Treasure Hunt Thursday * The Scoop * Homework * Wow Us Wednesday * Inspire me Monday * That DIY Party
I'm in the process of trying to grow my own herbs. I forgot to think forward as to how I will be preserving it. Your post was very helpful and I will be pinning it to refer back to when the time comes to dry the herbs.
ReplyDeleteP.s. That caterpillar is a star!
Thank you for your kind words Lily! I hope you are enjoying your herbs as much as I do. Yeah, that caterpillar was a scene stealer {wink}.
DeleteThanks for the great tutorial. Now I need to be careful of the sunlight and also my balcony is pretty breezy, maybe indoors would be the best solution.
ReplyDeleteThanks for dropping by Mary!
DeleteThese are all great tips, Mei Ann! I'll be sharing your project at The Scoop this Monday night. Thank you for linking up!
ReplyDeleteThe pleasure is mine Suzy! Thank you for choosing my post. You have no idea how grateful I am. God bless you and the ladies from The Scoop!
DeleteLove your tips and photos and I will feature this at Wow Us Wednesdays this week. Thanks for sharing at Wow.
ReplyDeleteI have dill, basil, rosemary and chives in a large window box. Can I bring that in and keep them growing. Thanks.
ReplyDeleteThank you!! I really don't want to let my herbs go this year, so I'm planning on drying them. (I just knew you would've relocated that cute green guy!) ~Zuni
ReplyDelete